In this tutorial you will learn how to install WordPress on Microsoft Azure using the Bitnami version of WordPress on Azure.
Hosting WordPress on Microsoft’s massive cloud network allows you to take your WordPress website to the next level.
Although hosting WordPress on Azure offers amazing performance, it can be challenging. If you’re a new to the development world, you may be interested in managed shared hosting or managed cloud hosting.
To get started, create a free Azure account and follow along with the video above. If you get stuck, check below to see the steps listed individually with their commands.
There are 3 steps in this tutorial:
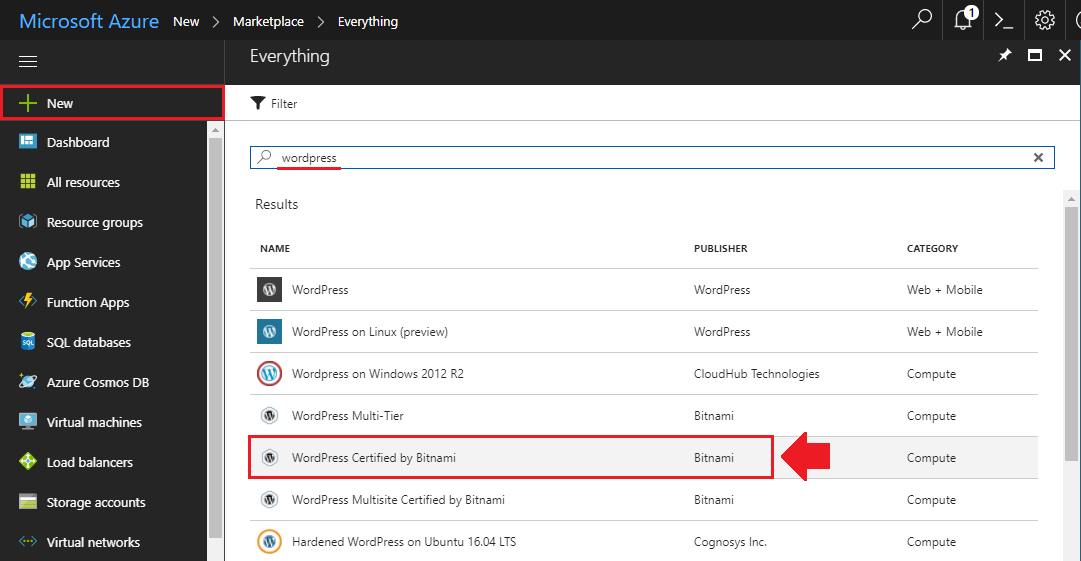
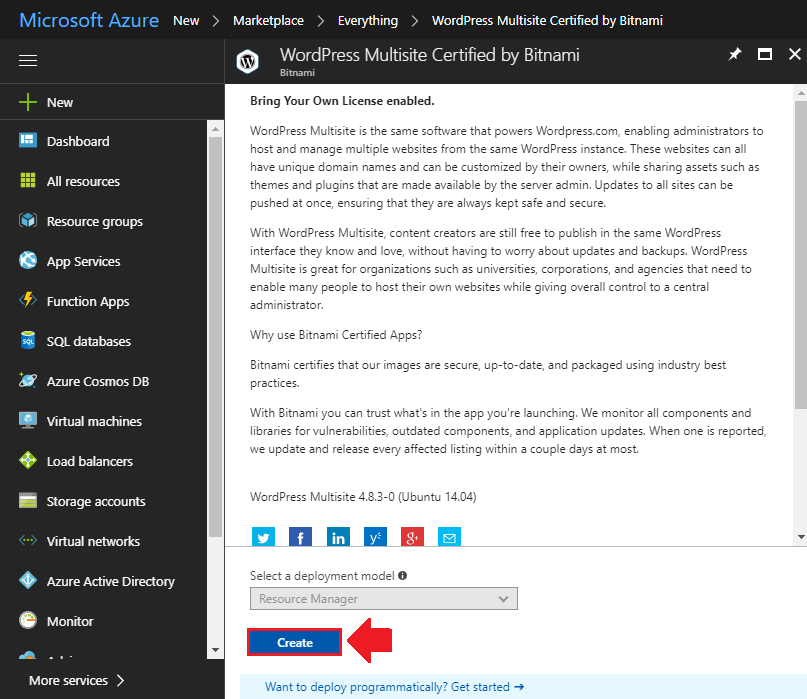
1. Launch WordPress Installation
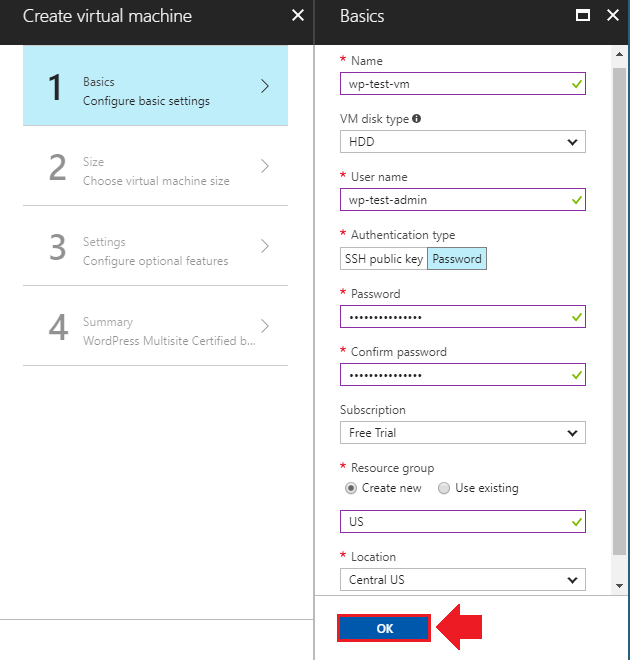
2. Configure WordPress Installation
2.1 Basic Settings
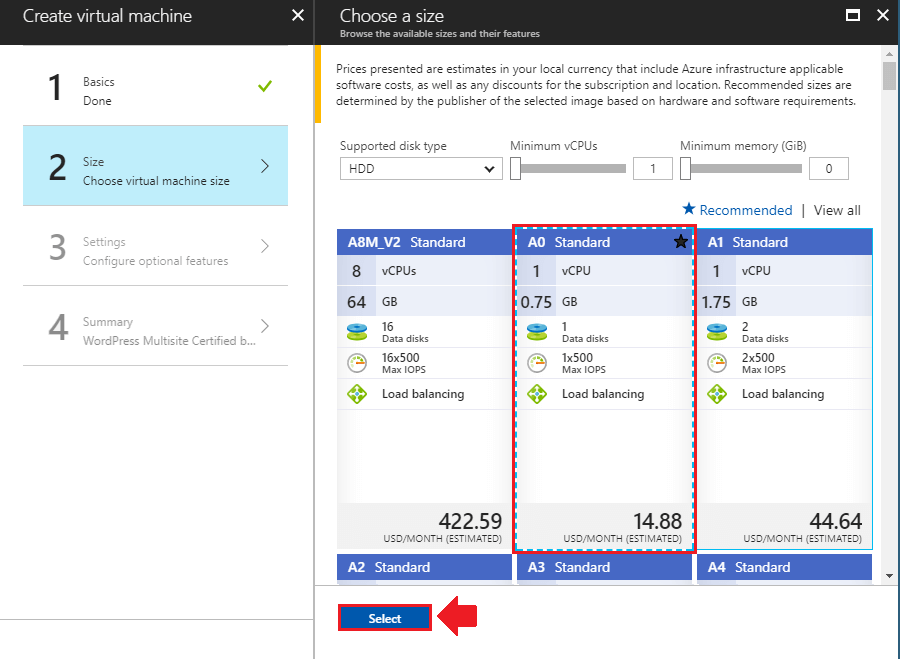
2.2 Hardware Settings
2.3 Network Settings
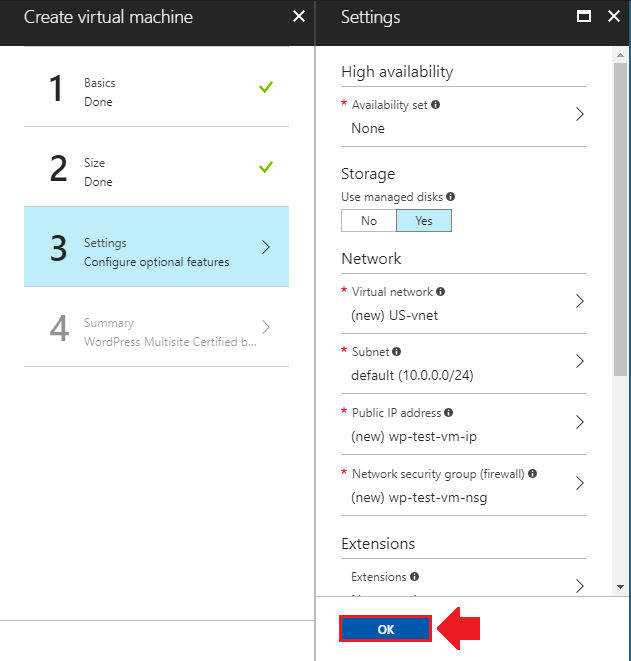
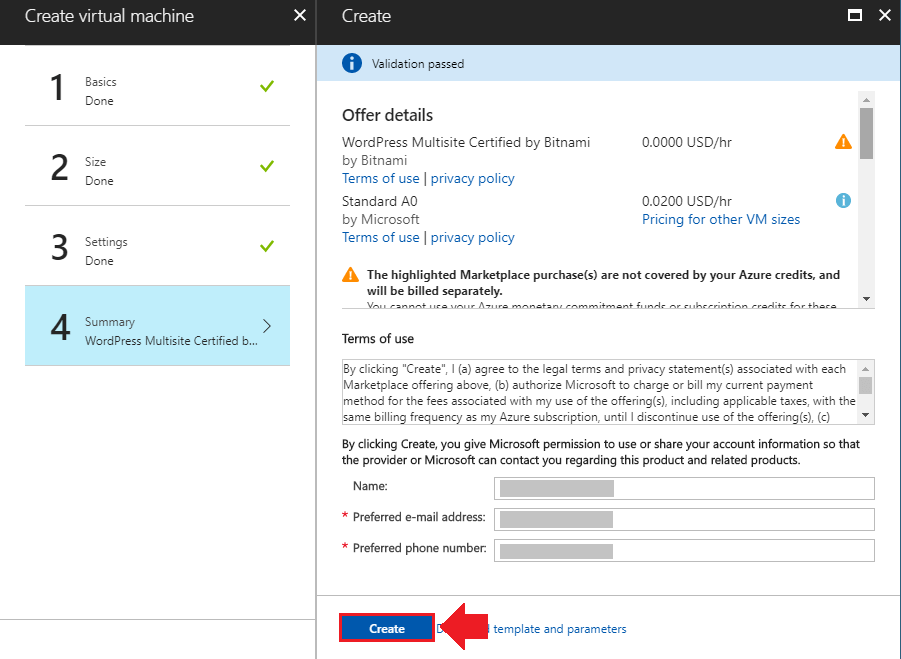
2.4 Finalize Deployment
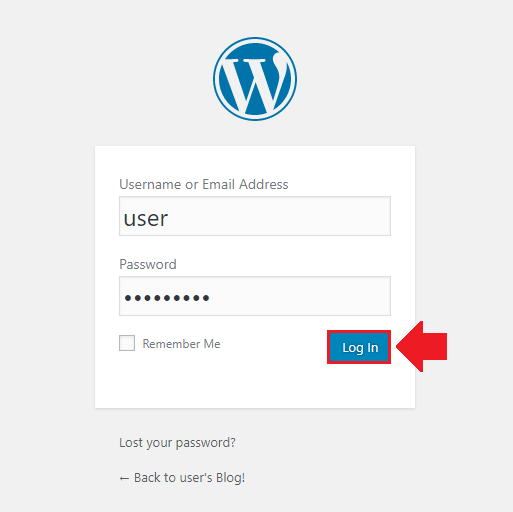
3. Login to WordPress
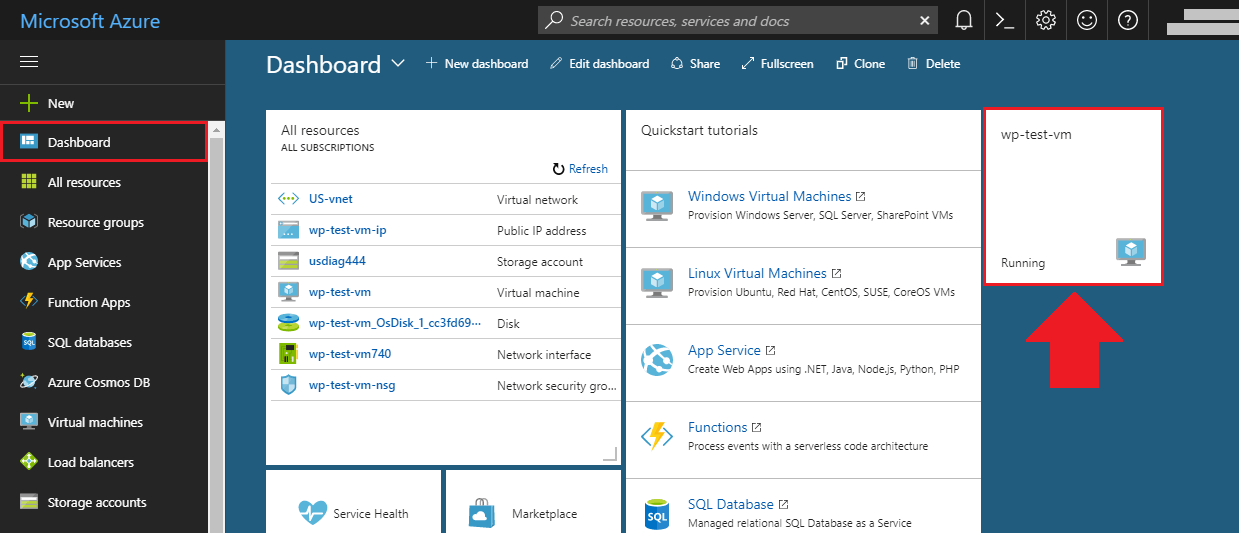
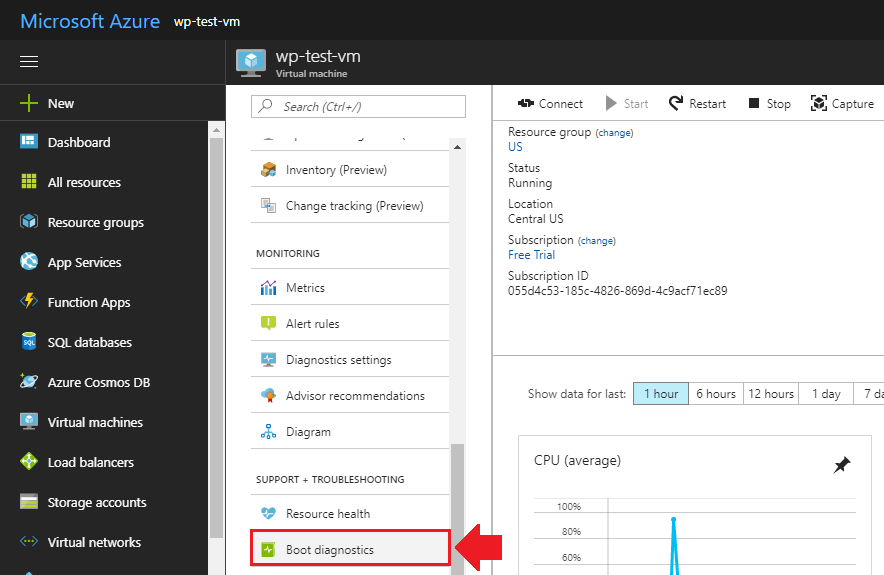
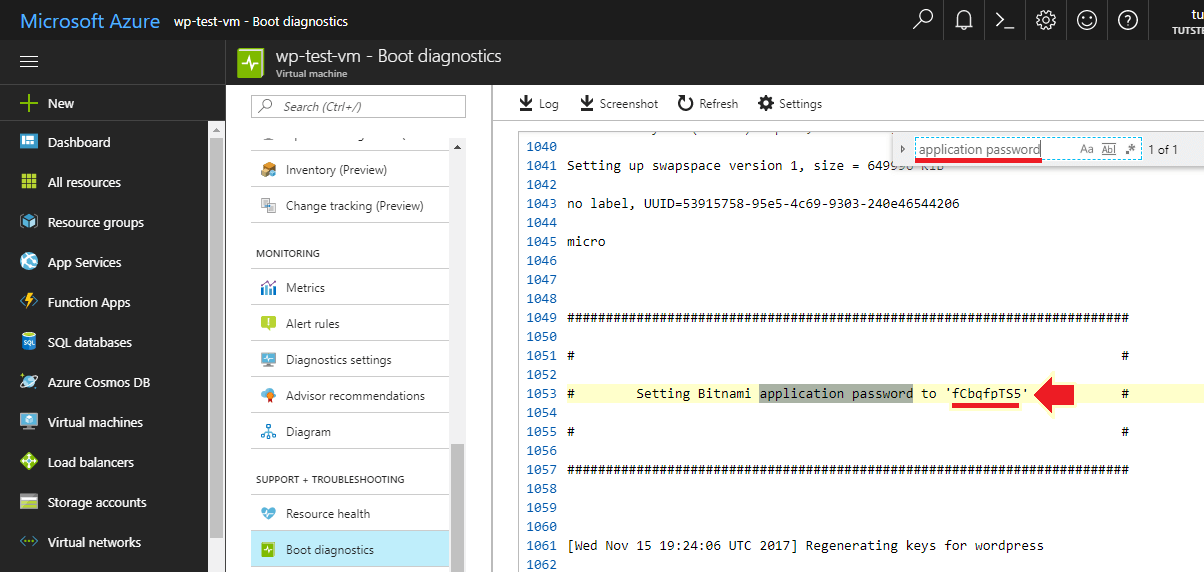
3.1 Retrieve Login Credentials
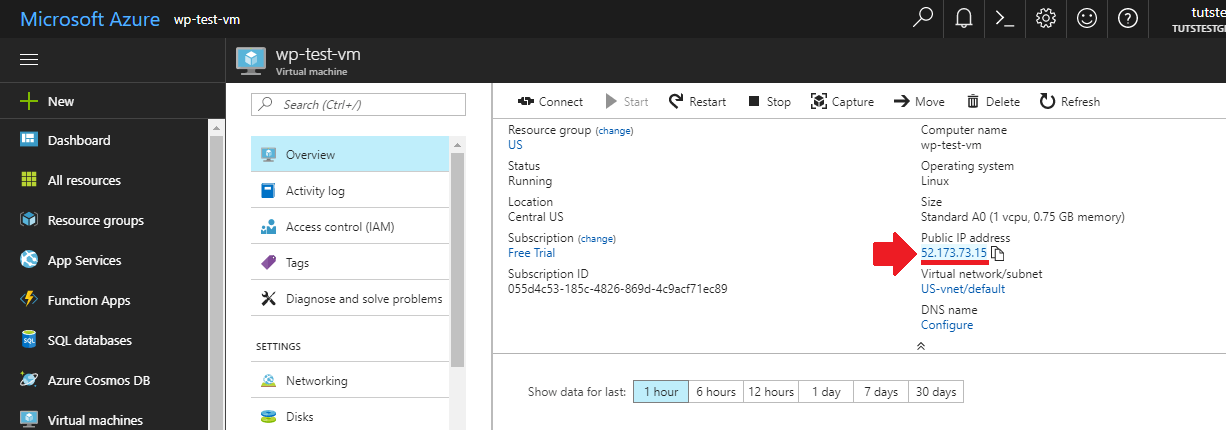
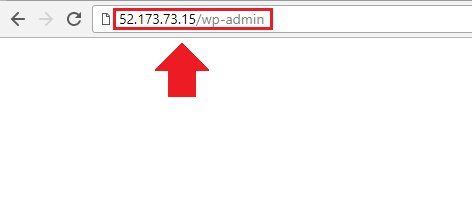
3.2 Access WordPress Dashboard
That’s it!
You’ve successfully launched a WordPress application in a virtual machine on Microsoft Azure!
Now that your WordPress application is successfully configured, you can look into more advanced functionality such as setting up a domain name and SSL encryption.
If you have any questions or comments about this tutorial, please be sure to post them below!
Thanks,
![]()
Up Next…
sudath Chandrawansha says
i think this steps has been changed can you please update the post?
Leron Amin says
Hi Sudath,
I will look into updating the post.
Let me know if you have any other questions,
Joe
Netzih says
Out of curiosity why do you use Bitnami instead of just using the regular WP app in AZURE?
Leron Amin says
Hi Netzih,
The Bitnami solution includes some additional components that are meant to improve on performance and security. The other solution is more bare-bones, and requires you to configure many of these features on your own.
Hope this helps,
Joe
caleb adekunle says
Hey onepagezen great tutorial but you didnt tell us how to link our domain name to azure. will be glade if i can have access to this info thank you and a quick and kind reply will be much appreciated
Leron Amin says
Hi Caleb – that tutorial is available here: How to transfer a domain name to Azure.
Caleb adekunle says
Thanks a lot I will quickly apply this straight away please I have one last question” I have searched all over the Internet for SMTP email setup for WordPress with azure I found non. This is very important aspect of my work because the website has to do with people receiving registration code. I will be glade if you as well have a solutions to this please thanks a lot and I will appreciate another favorable reply from you thank you once more
Arman says
Hey Leron,
Please make a tutorial on how to install Cpanel in Microsoft Azure?
Thanks
Leron Amin says
Hi Arman,
I will look into doing a tutorial on the subject in the future.
Thanks for the suggestion!
Joe
Arman ali says
Hi Leron Amin,
How many take time to make a video on how to install cpanel on Google cloud platform?
please make fast.
Thanks
proib says
please help me on how can I remove Network admin in Azure Cloud
Leron Amin says
What did you think of this tutorial?
Please share your questions and comments!