After you’ve installed an application such as WordPress on Microsoft Azure, the next step is to transfer your domain name to Azure so that it links to your website.
Taking the time to properly configure a domain name for your website is an easy way to prevent search engine indexing issues from occurring.
By default, Azure allows you to assign a generic domain name to your application. However, using a generic domain name is bad for your website’s SEO.
If you would rather use a custom domain name such as yourwebsite.com, then read on for instructions on how to transfer your domain name to Azure.
Before getting started with this tutorial, you should have already installed an application such as WordPress on a Microsoft Azure virtual machine.
There are 8 steps in this tutorial:
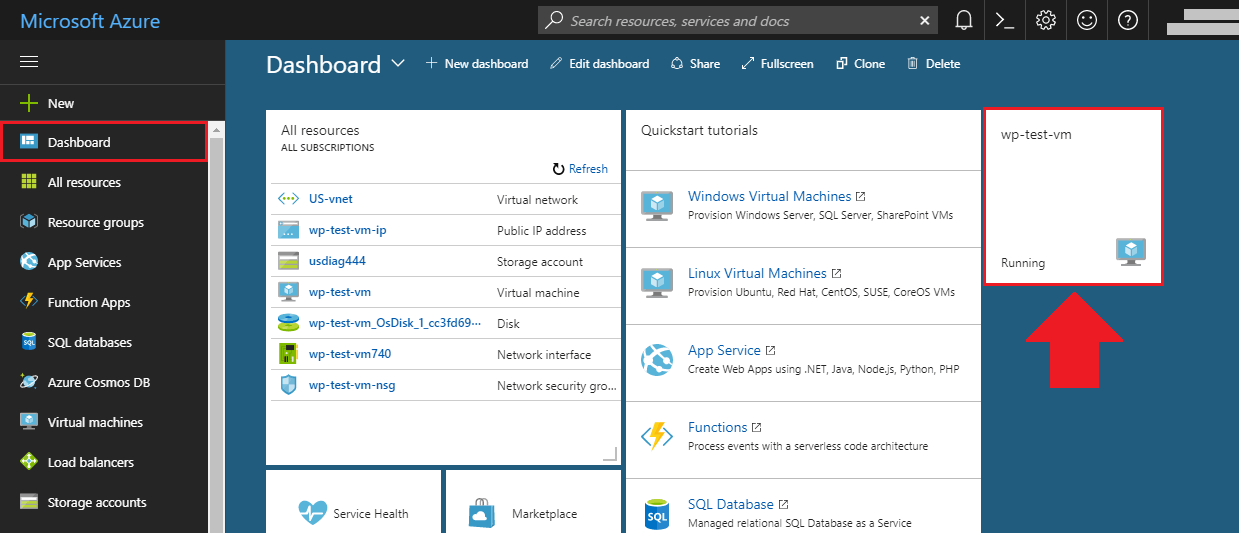
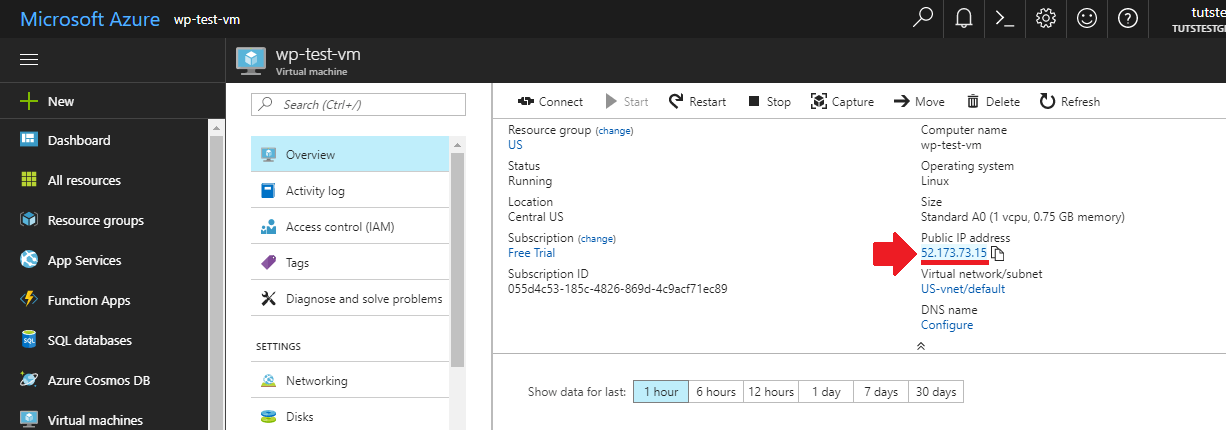
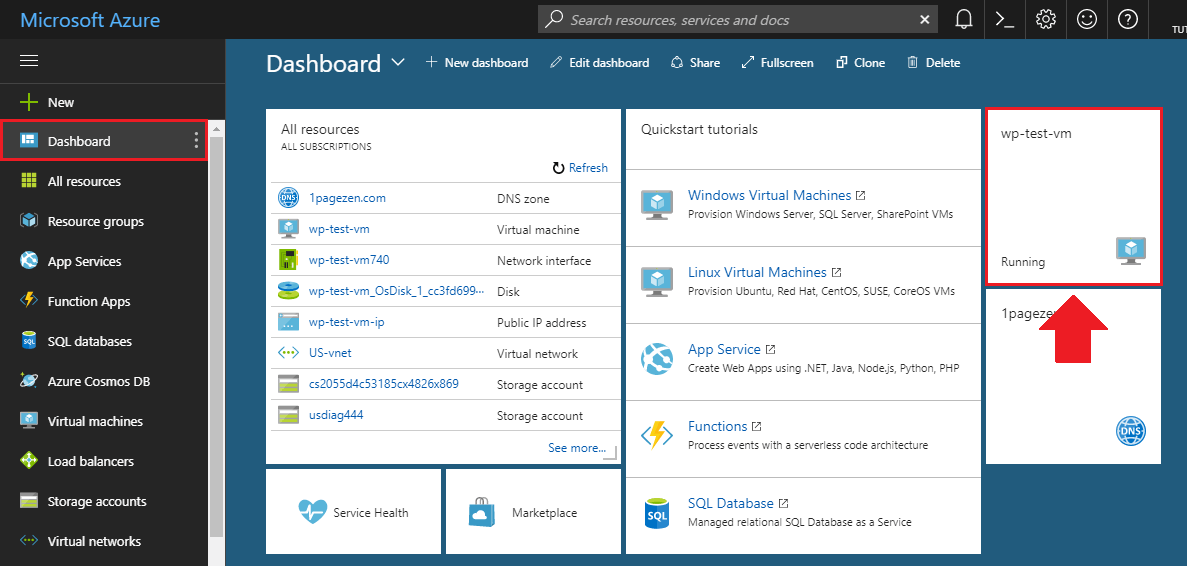
1. Copy Virtual Machine IP
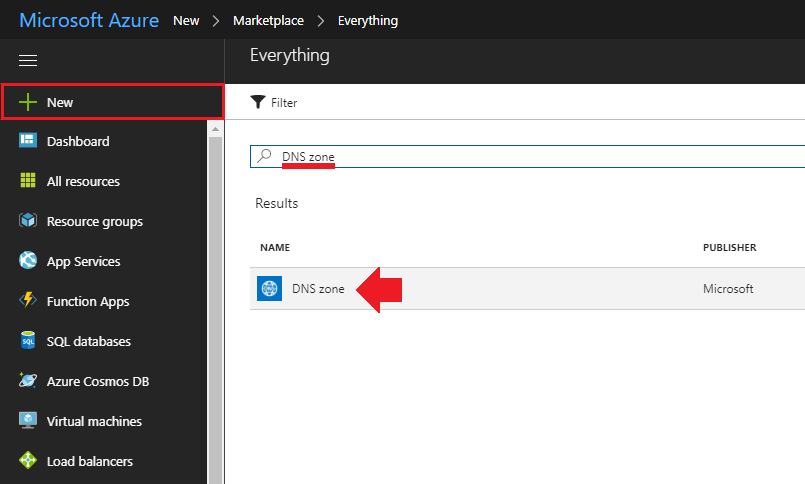
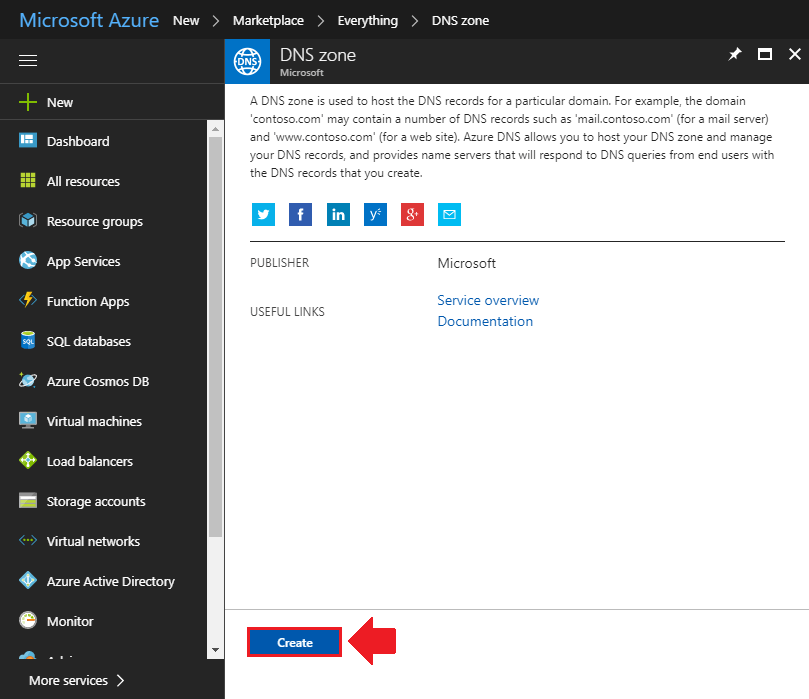
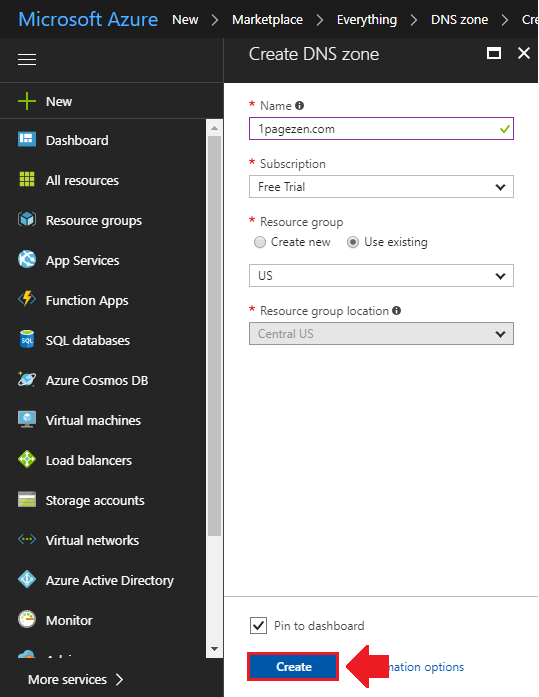
2. Create a DNS Zone
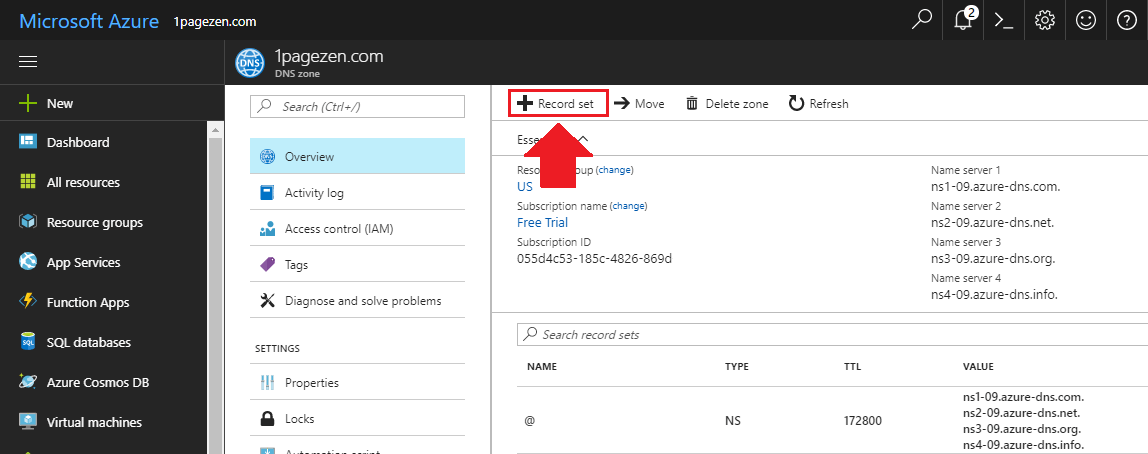
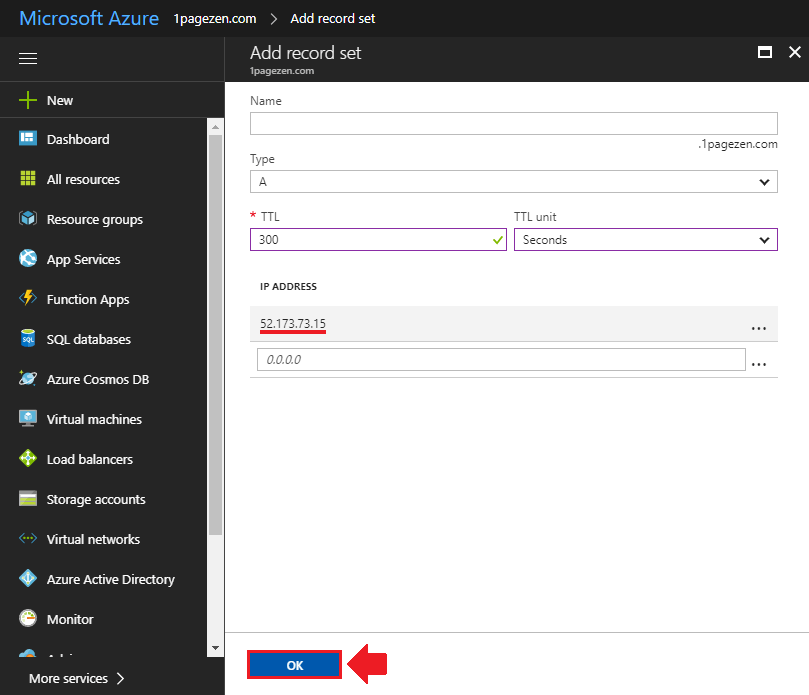
3. Add “A” Record
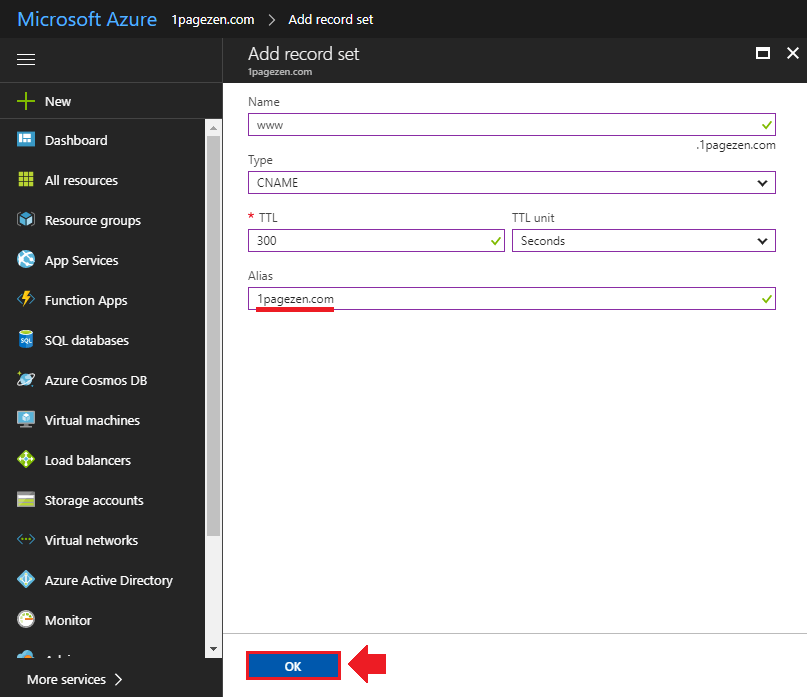
4. Add “CNAME” Record
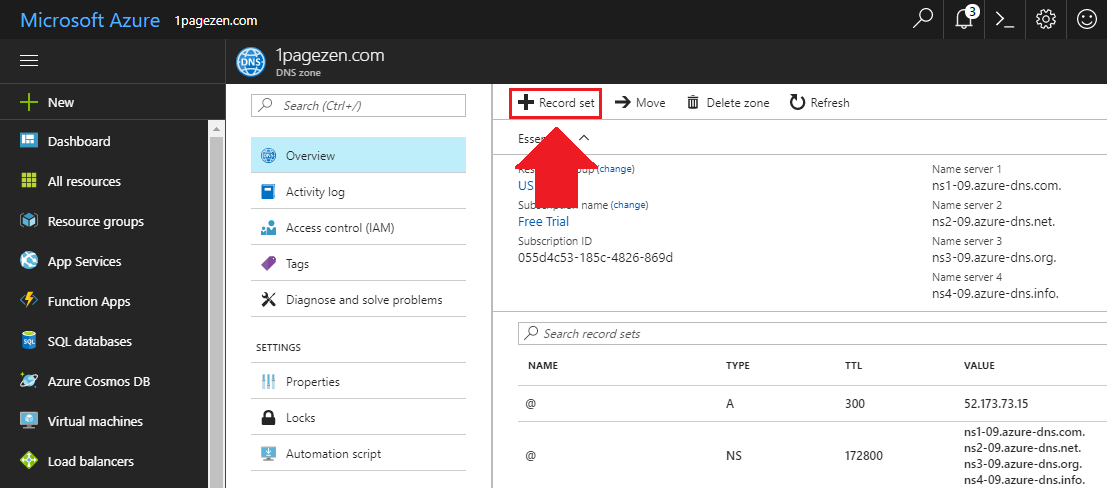
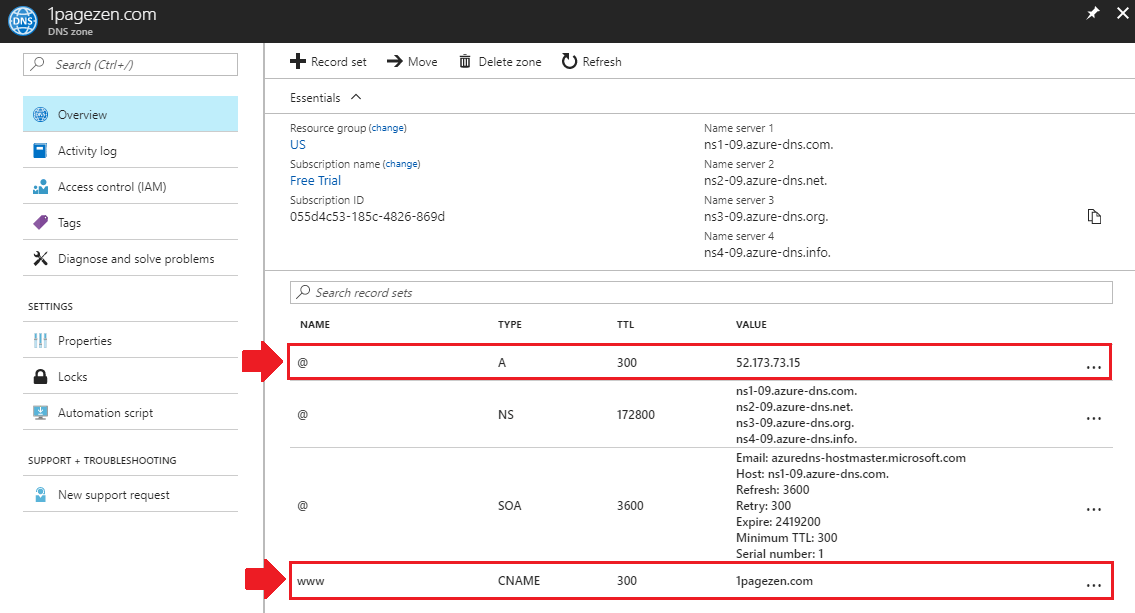
5. Review Record Set
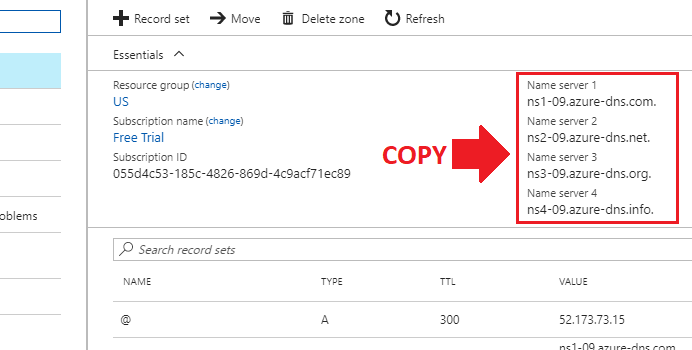
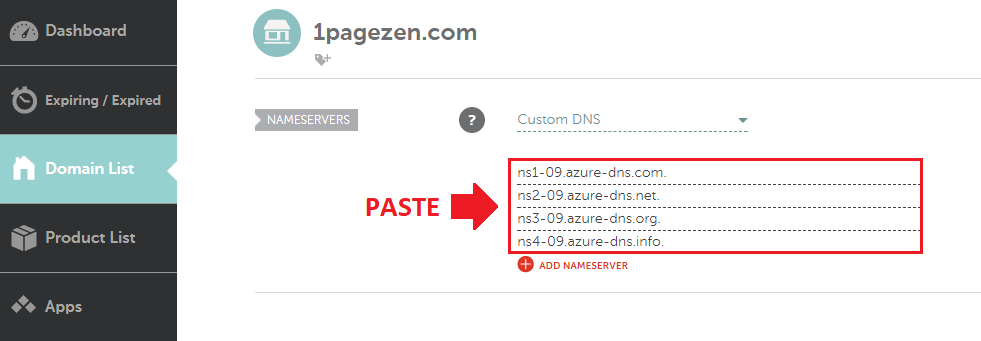
6. Edit Domain Name Servers
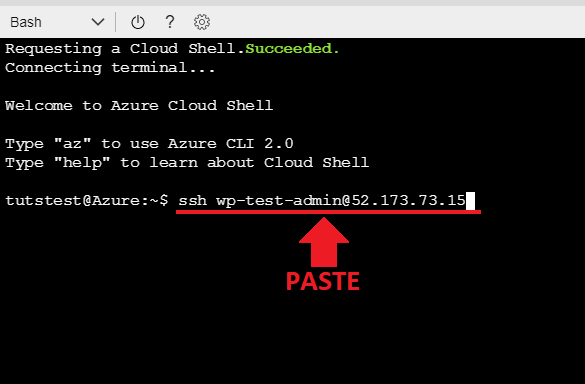
7. Test Settings

8. Include www. Prefix (Optional)
By default, your domain name will show without the www. prefix.
If you would rather your domain name show up as www.example.com instead of just example.com, then read on for configuration instructions.
NOTE: The instructions below are intended for users running Bitnami’s WordPress stack on Azure. If you’re using a different Apache configuration, remember to substitute the bitnami.conf file with your server’s htaccess equivalent.
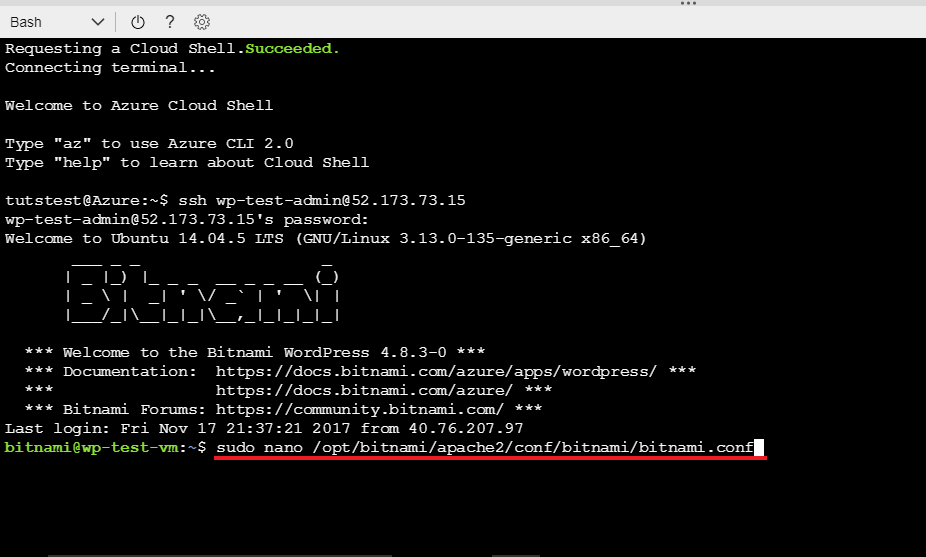
sudo nano /opt/bitnami/apache2/conf/bitnami/bitnami.conf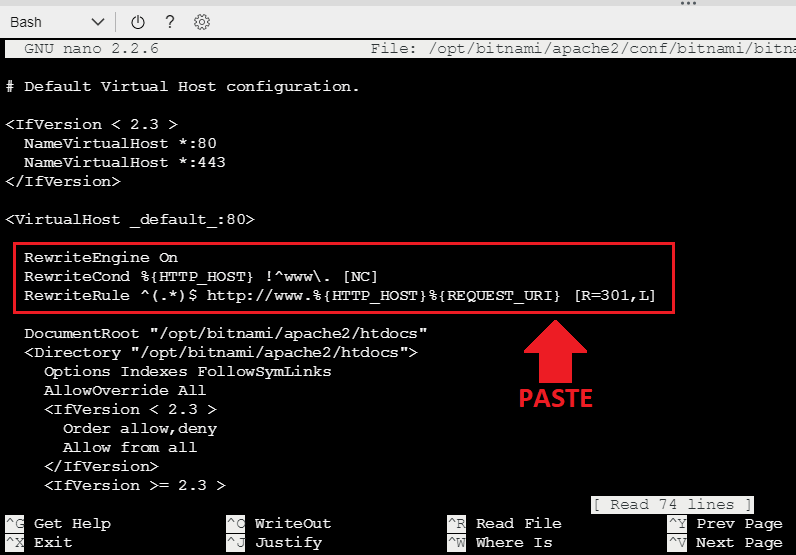
  RewriteEngine On
  RewriteCond %{HTTP_HOST} !^www\. [NC]
  RewriteRule ^(.*)$ http://www.%{HTTP_HOST}%{REQUEST_URI} [R=301,L]
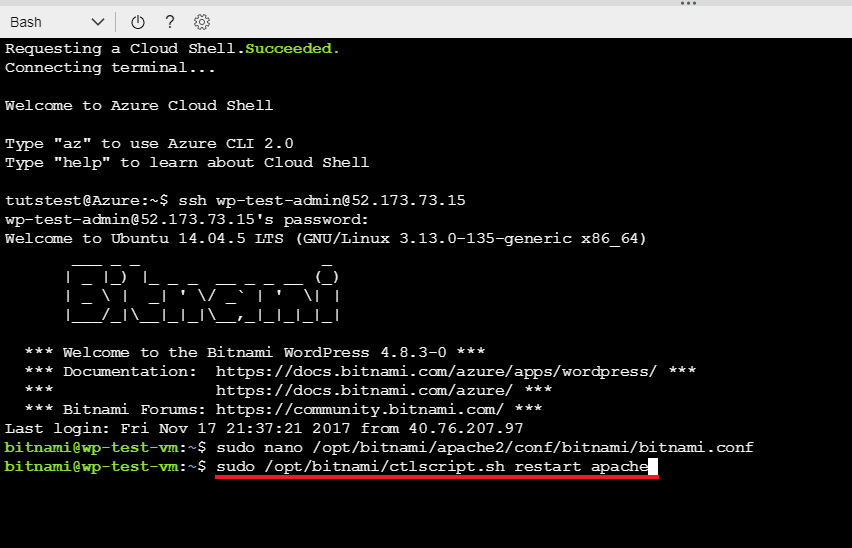
sudo /opt/bitnami/ctlscript.sh restart apacheDid it work?
If you have general questions or comments about this tutorial, please feel free to leave them below.
If you benefited from this tutorial, and would like to support One Page Zen, please like our Facebook page and subscribe to our YouTube channel.
Thanks,
![]()
Up Next…

martin says
hi
i have one hosting provider giving hosting and email services
i have currently configured dnszone named servers on godaddy to point to above hosting provider
where it is redirected to azure web app services through cname and a record.
Thx i understand from above that dnszone can be create cname and a record on azure itself.
My only question how can i use the email services only of current hosting provider after
if i have switched dnzzone on to azure?
appreciate u help
Leron Amin says
Hi Martin,
You will still have DNS mail records that are specific to the email services on your current hosting provider.
All you would need to do is to copy and paste those mail records from your email services provider and add them to your DNS Zone on Azure.
Let me know if you have any questions,
Joe
proib says
Awesome!, got it but having a problem on my site previews and dashboard
Dashboard: Two dashboard display= Network admin and my user
Site preview: Greetings Network Administrator! The network currently allows both site and user registrations. To change or disable registration go to your Options page.
pls how can I fix this
proib.us
Venky says
Awesome tutorials
Leron Amin says
Thanks Venky! 🙂
Leron Amin says
What did you think of this tutorial?
Share your questions and comments below!